Working with Nodes
Yarn Scripts are stored as text files, but they contain narratives and flows that can also be represented as graphs. Everyone loves graphs! Yarn Spinner for Visual Studio Code provides a handy Graph View.
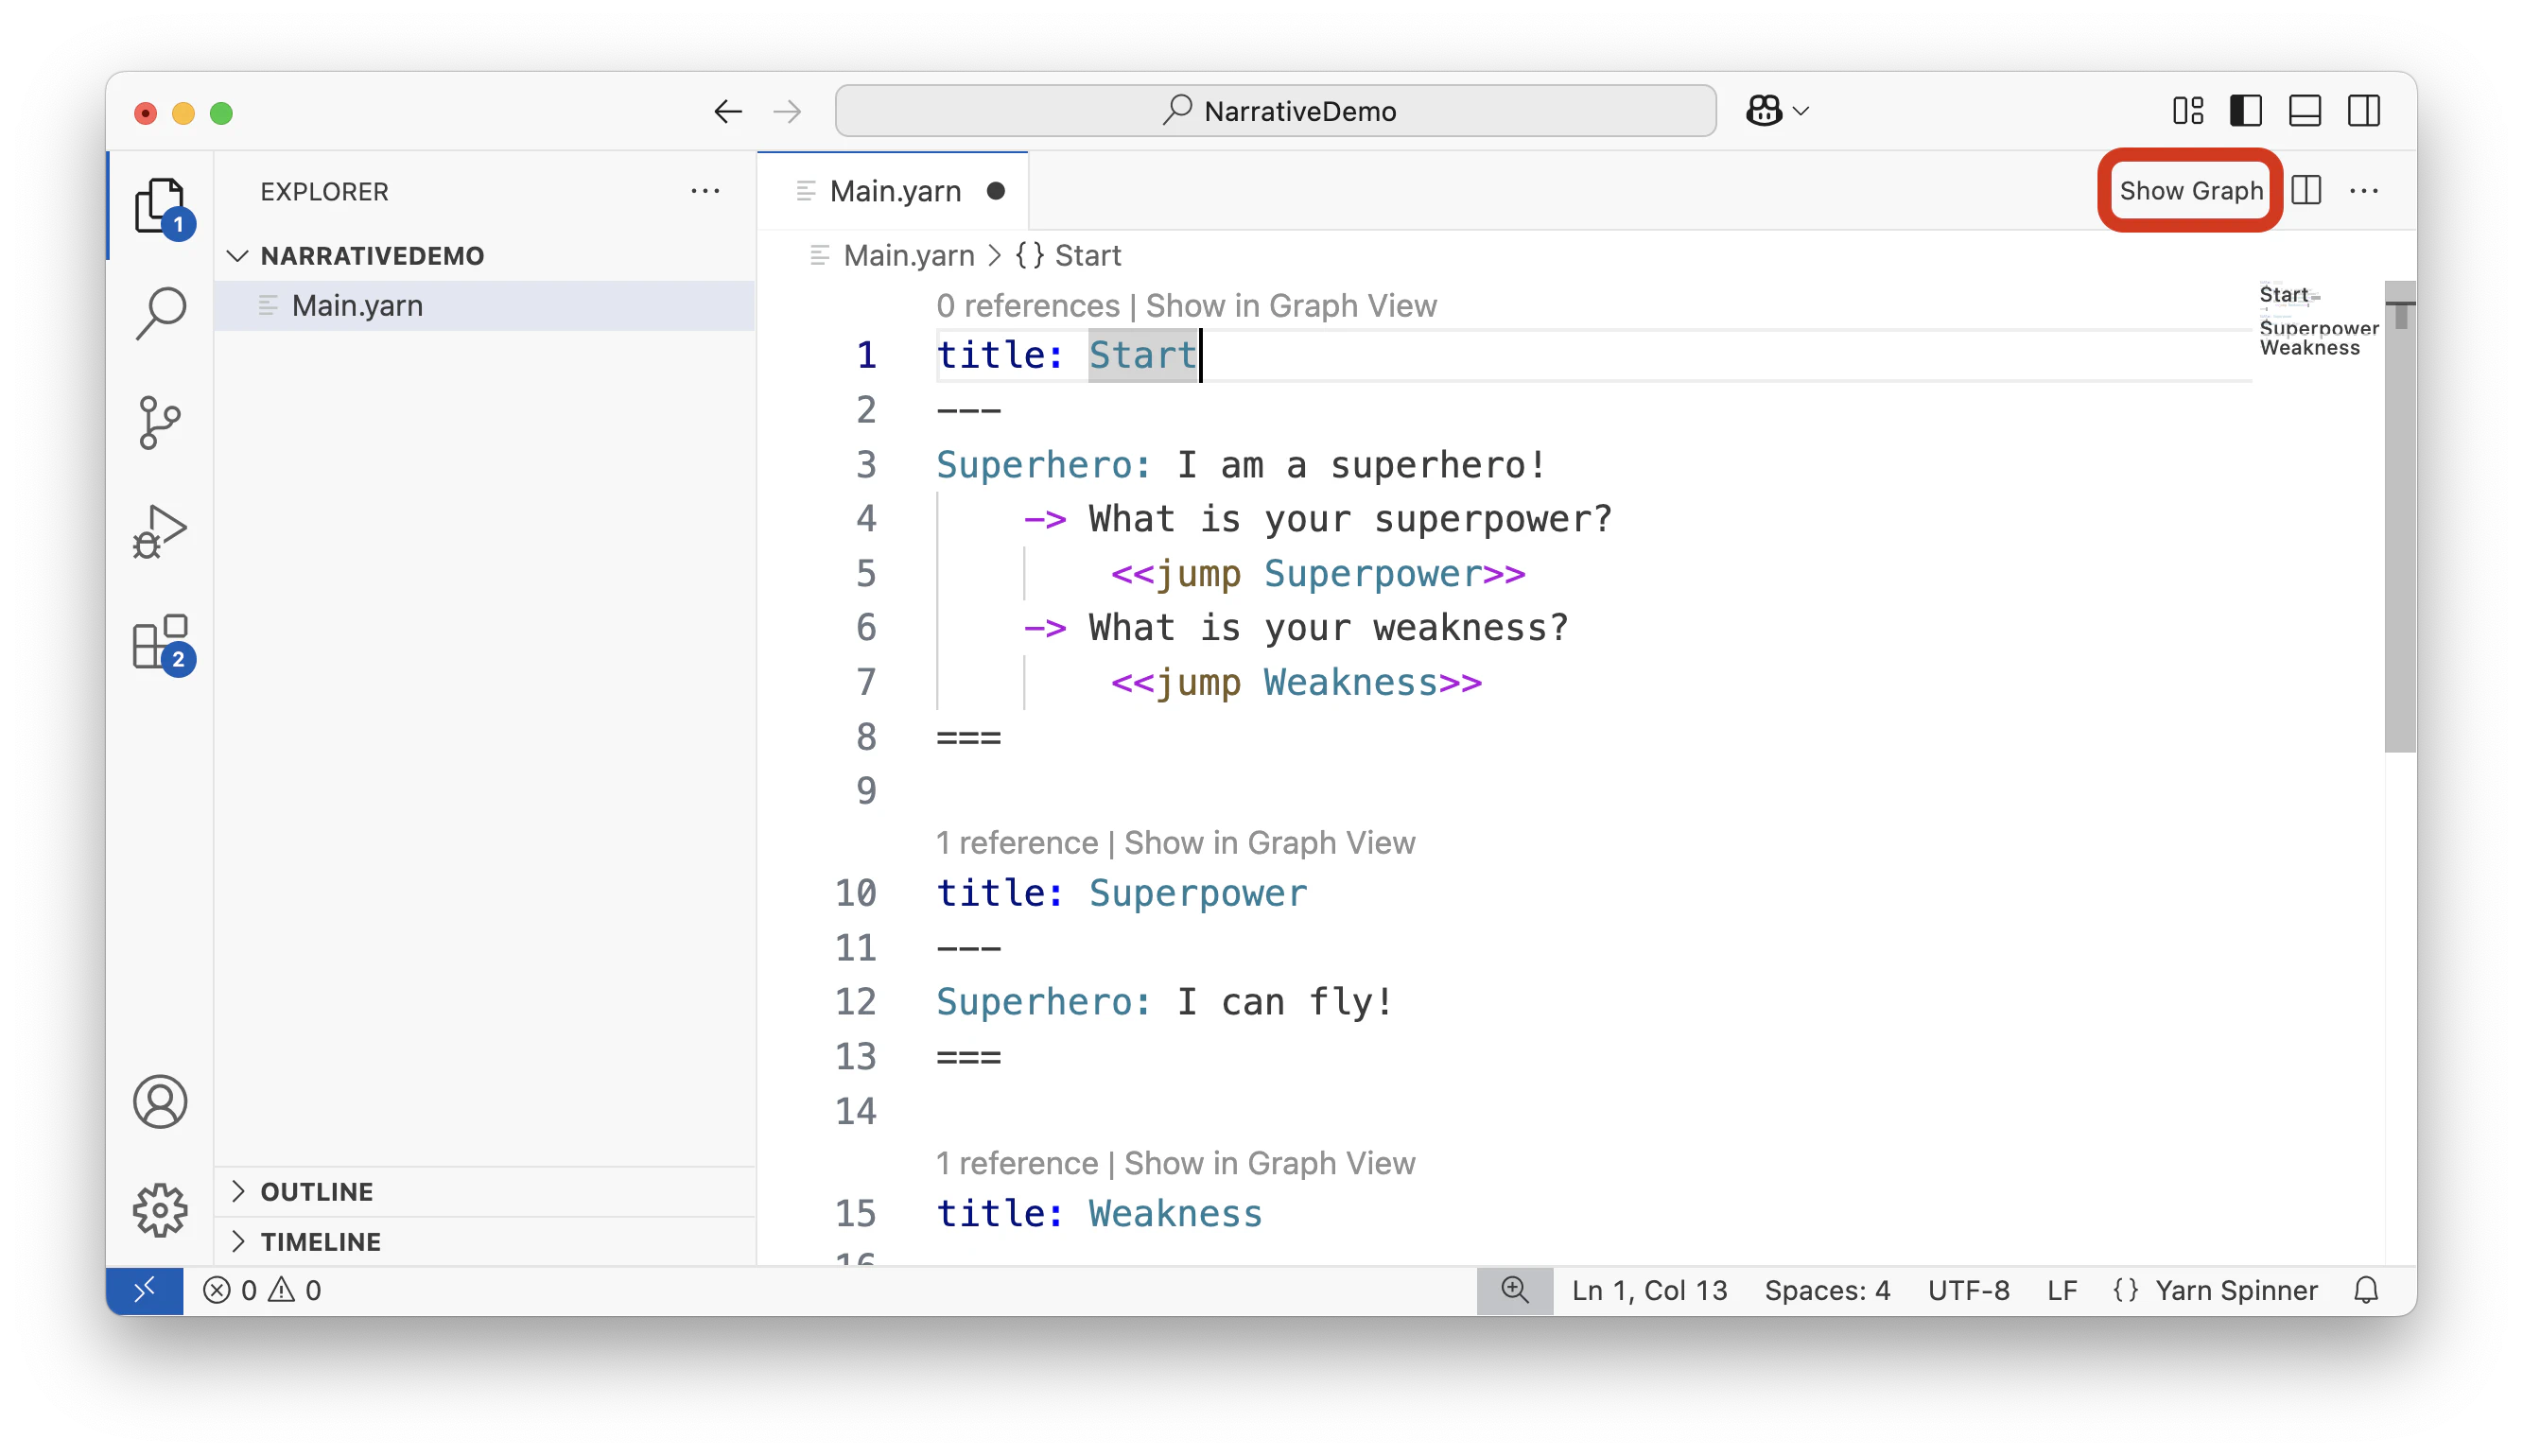
Open the Graph View for your Main.yarn file by clicking the Graph View button located in the top right-hand corner of the window.
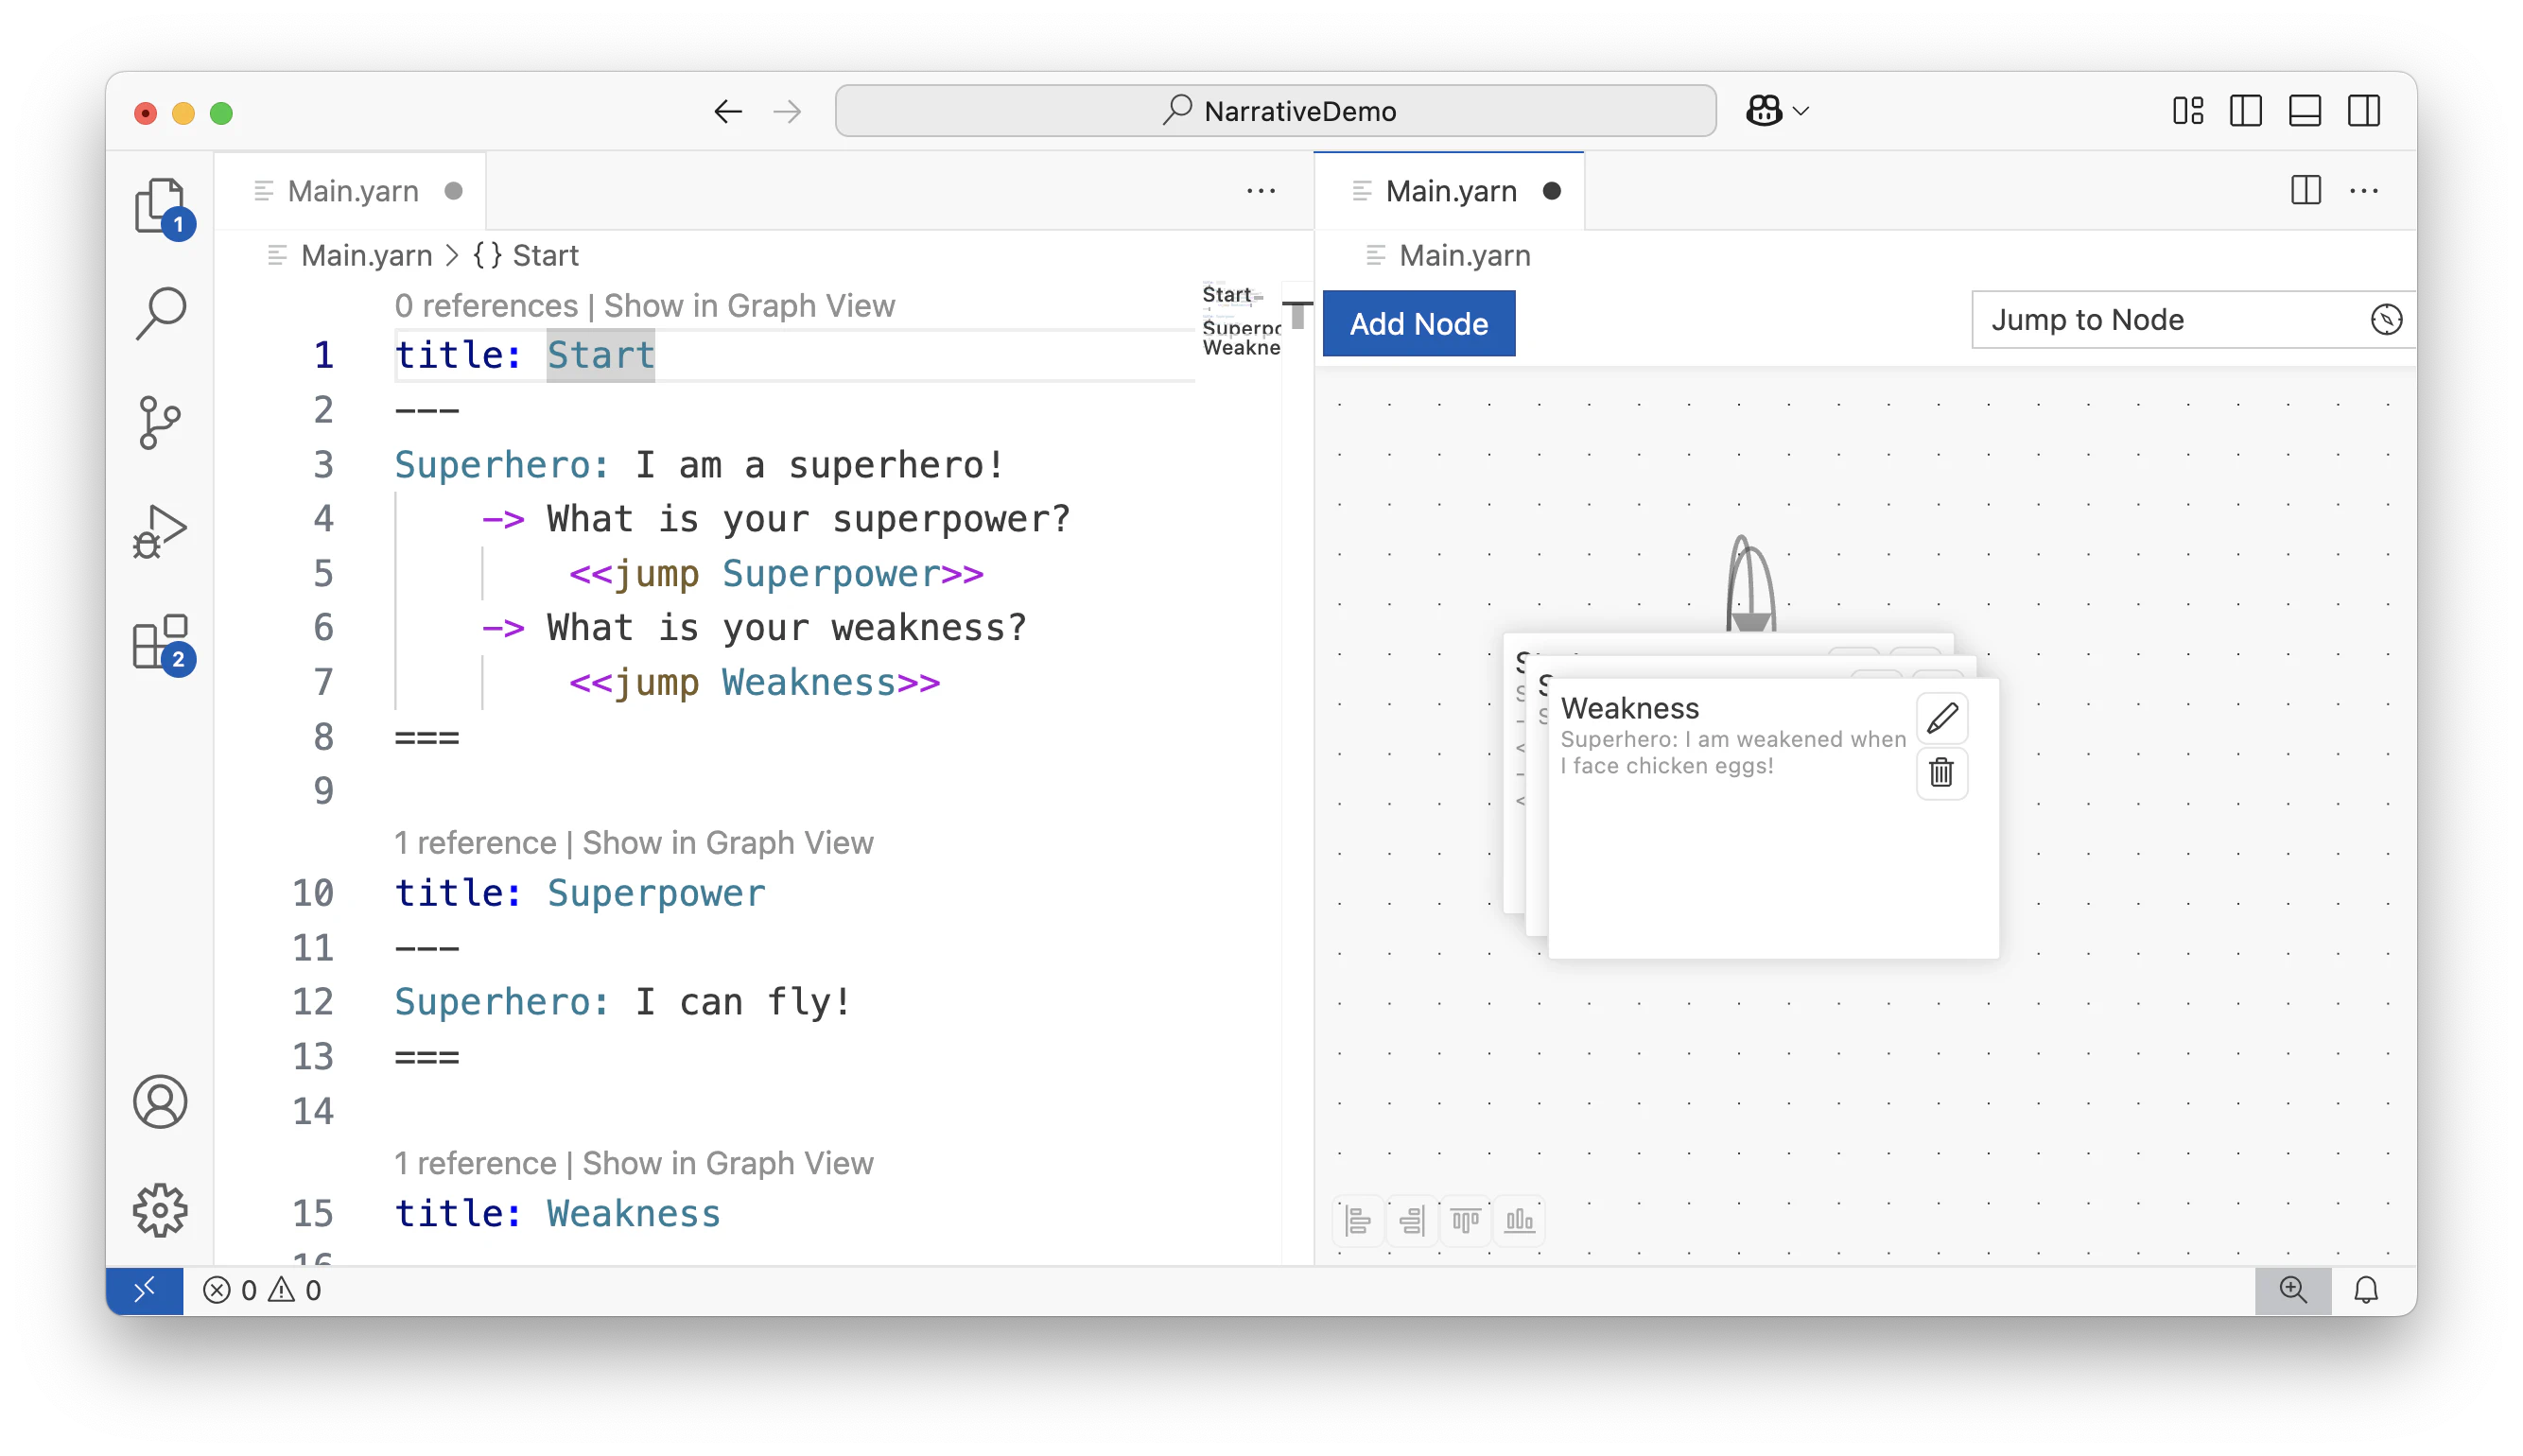
 You might notice that, when you first look at the Graph View for a
 .yarn file, all the nodes appeared stacked on each other.
 To make sense of things, and better understand the shape of your narrative, you can rearrange the nodes by clicking and dragging them to wherever you want them.
 When you reposition a node, a new value,
 position, will be stored in the header of the node.title: Superpower
position: 220,-95
---
Superhero: I can fly!
===
You can also use the Add Node button, found at the top of the graph view, to add new nodes. New nodes will appear immediately in both the graph view and the text editor.
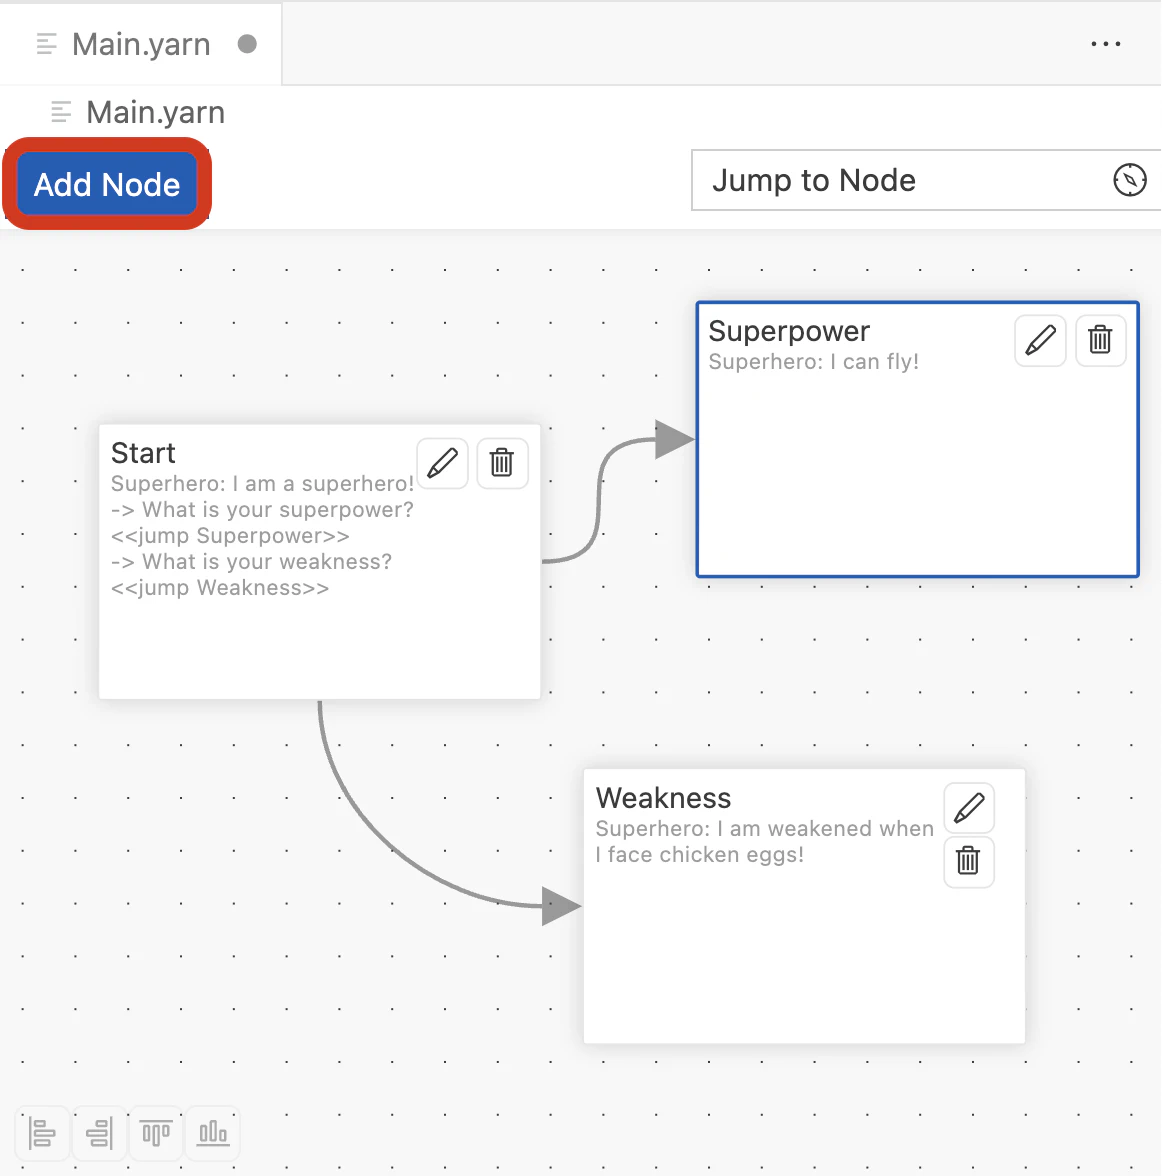
Add a new option, with a corresponding <<jump>> to a new node, to Main.yarn.
title: Start
position: -49,-40
---
Superhero: I am a superhero!
-> What is your superpower?
<<jump Superpower>>
-> What is your weakness?
<<jump Weakness>>
-> I am allergic to superheroes.
<<jump Allergic>>
===
title: Allergic
position: -11,321
---
Superhero: Well, maybe I'm allergic to you!
===
title: Superpower
position: 220,-95
---
Superhero: I can fly!
===
title: Weakness
position: 169,115
---
Superhero: I am weakened when I face chicken eggs!
===
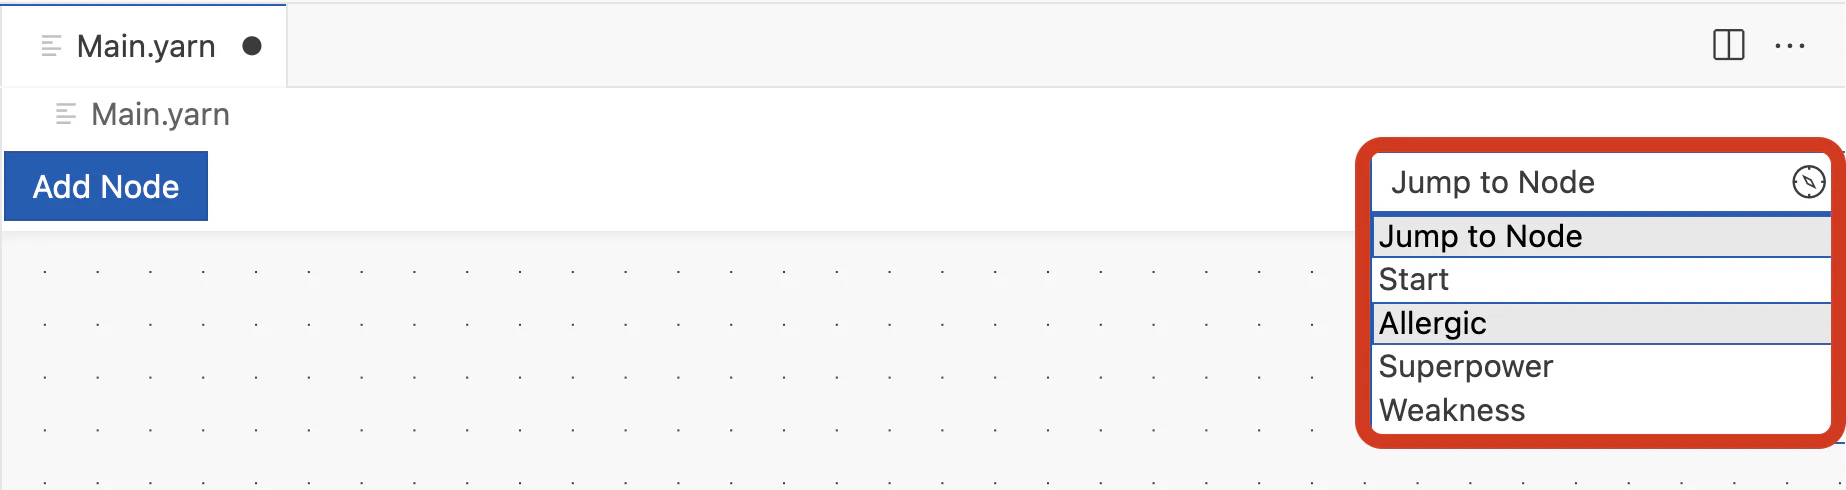
If you have a lot of nodes (and it’s likely that you will), you can use the Jump to Node menu, found in the top right-hand corner of the graph view, to jump the graph view to a specific node.
 You can also use the graph view to jump the text view to a specific node by double-clicking the node in the graph view.
 And you can jump to a specific node in the graph view, by clicking Show in Graph View, found above each node in the text view.